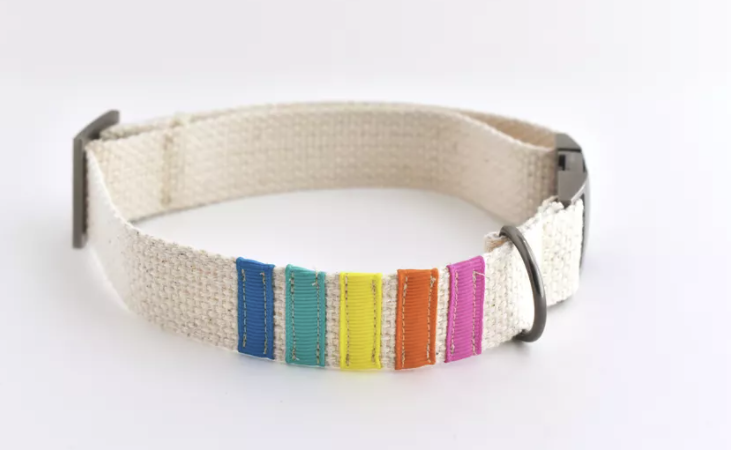
DIY Adjustable Dog Collar
Making your pup his or her very own collar can help their personality shine, and the best part is that it is so easy to make. Creating the basic collar is super quick. Customizing it is the best part, and that’s where you can get really creative and have fun with it. Making the collar adjustable is a great way to make a collar that can accommodate a growing pup.
Dog collars come in a wide variety of sizes and widths, as well as hardware. The width should correspond with your dog’s size so that they can be comfortable.
To do this, measure the circumference of your dog’s neck and multiply the circumference by 1.5. Make adjustments as necessary, making sure the collar will fit your dog properly without hurting them.
What You’ll Need
-scissors
-pins/sewing clips
-sewing machine
-cotton or nylon heavy-duty strapping
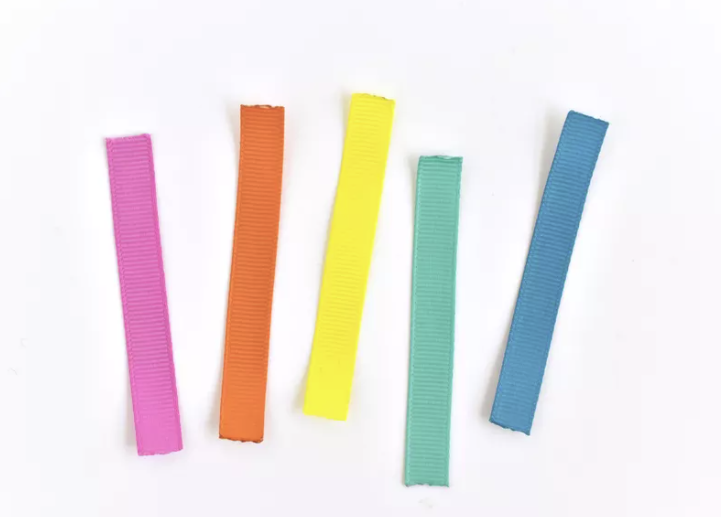
-ribbon scraps
-thread
-set of dog collar hardware
You Can Use Ribbons To Decorate
What To Do
Measure out your ribbon pieces to ensure they’re long enough to wrap around the strapping as well as overlap the back. Cut the ribbon, and seal the ends.
Measure 5 inches from one of the collar and wrap the ribbon around the strapping. Use a pin to hold the ribbons in place. Fold them over and sew the edges down.
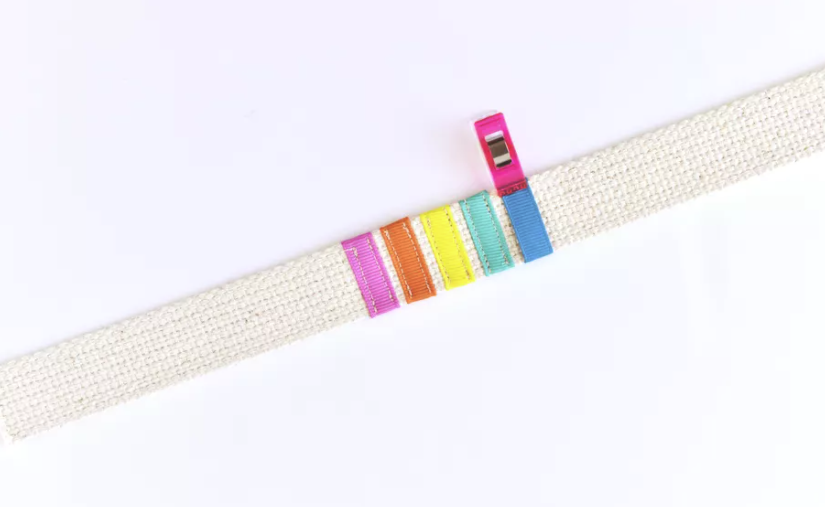
Sew The Ribbons Down
Slide the adjuster buckle while the right side of the collar is facing up. Fold back the end and using a zig zag pattern, sew across the belting. On the other end, slide on one side of the buckle clip.
Make sure all of the hardware is facing the correct direction so everything can come together properly. Slide the decorated part through the adjusted buckle.
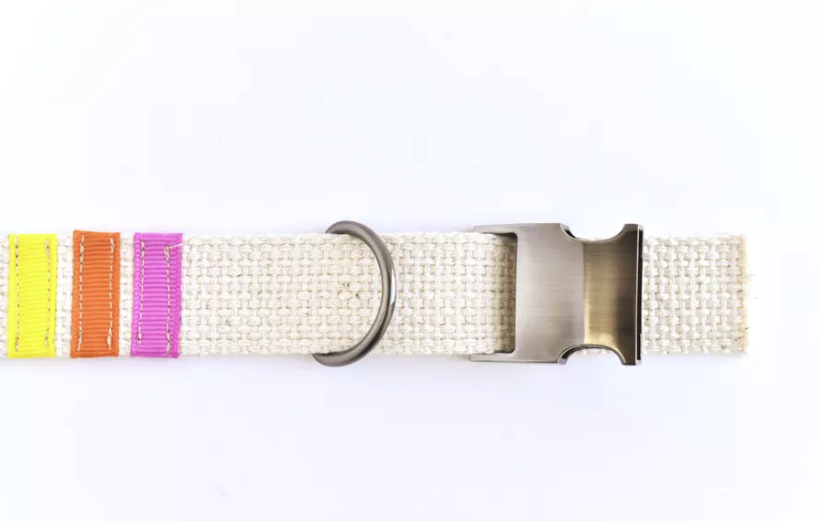
Make Sure Everything Is Aligned Properly
Slide the D-ring and the rest of the buckle clip on the decorated end of the collar. Make sure the front of the clip faces the D-ring. Folding back the webbing back. Hold the collar in place with pins as you sew in between the pieces of hardware, using a zig zag pattern.
Now is when you adjust the collar to ensure it fits your dog, and it’s ready for wearing! Of course, you can choose to customize your dog’s collar in any way you please. The possibilities are truly endless, so feel free to get as creative as you wish.